Tutorial
fsmapper offers various functionalities to enhance the flight simulation experience. It allows users to configure these functions flexibly to suit their own equipment and the aircraft they are piloting. Actually, this flexibility comes from fsmapper's configuration being written in Lua scripts. Therefore, to use fsmapper, one must first write Lua scripts.
In this page, examples of configuration scripts for some fsmapper's functionalities will be introduced, offering an understanding of the essentials of configuration scripts. After grasping these aspects in this tutorial, please refer to the Configuration Guide and the Library Reference to create tailored configuration scripts for your environment.
The illustrated Lua scripts in this tutorial are located under samples\tutorials\ within the fsmapper installation folder.
The intended readers of this document are beginners with fsmapper but have experience using Lua script language.
This document does not provide an explanation of the Lua script language.
Please refer to the Lua 5.4 Reference Manual or related literatures for information on Lua script language.
Your first configuration file
The most critical concept in writing fsmapper's configuration files is its event-driven behavior.
When events occur, such as pressing a button on a flight stick, tapping on a virtual instrument panel, or the caution light in the aircraft illuminating, you describe in Lua scripts what actions to take in response to those events.
By registering the relationship between events and actions as a table in a format called Event-Action mapping definition, the system triggers the actions appropriately at the right timing.
So, let's take a look at the first script example then.
local my_event = mapper.register_event('My Event')
mapper.set_primary_mappings{
    {
        event = my_event,
        action = function (evid, value)
            mapper.print('Value: ' .. value)
            mapper.delay(2000, function ()
                mapper.raise_event(my_event, value + 1)
            end)
        end
    }
}
mapper.raise_event(my_event, 1)
The highlighted portion (lines 3 to 11) represents the Event-Action mapping definition.
In this example, the script registers an event named 'My Event' using mapper.register_event(),
sets actions for that event using mapper.set_primary_mappings(),
and finally triggers the 'My Event' event with mapper.raise_event().
As evident from the arguments of mapper.raise_event() and the arguments of registered function acting as action, each event carries an associated value.
While the type of value varies for each event, there are no system constraints on these values.
Any object expressible in Lua can be set as the associated value for an event.
In this script, the initial 'My Event' raised is associated with the numeric value 1.
The function registered as an action prints the associated value to console with mapper.print(),then raises a 'My Event' event with the value of the received event plus 1, after a delay of 2000 milliseconds by using mapper.delay().
Start App to Observe events
Let's run fsmapper.exe.
If it's your first time running fsmapper, a file selection dialog will appear. Please specify the aforementioned script tutlial1.lua. If the dialog doesn't appear, press the [Stop] button in the top right to halt the script, then use the adjacent button to display the file selection dialog.
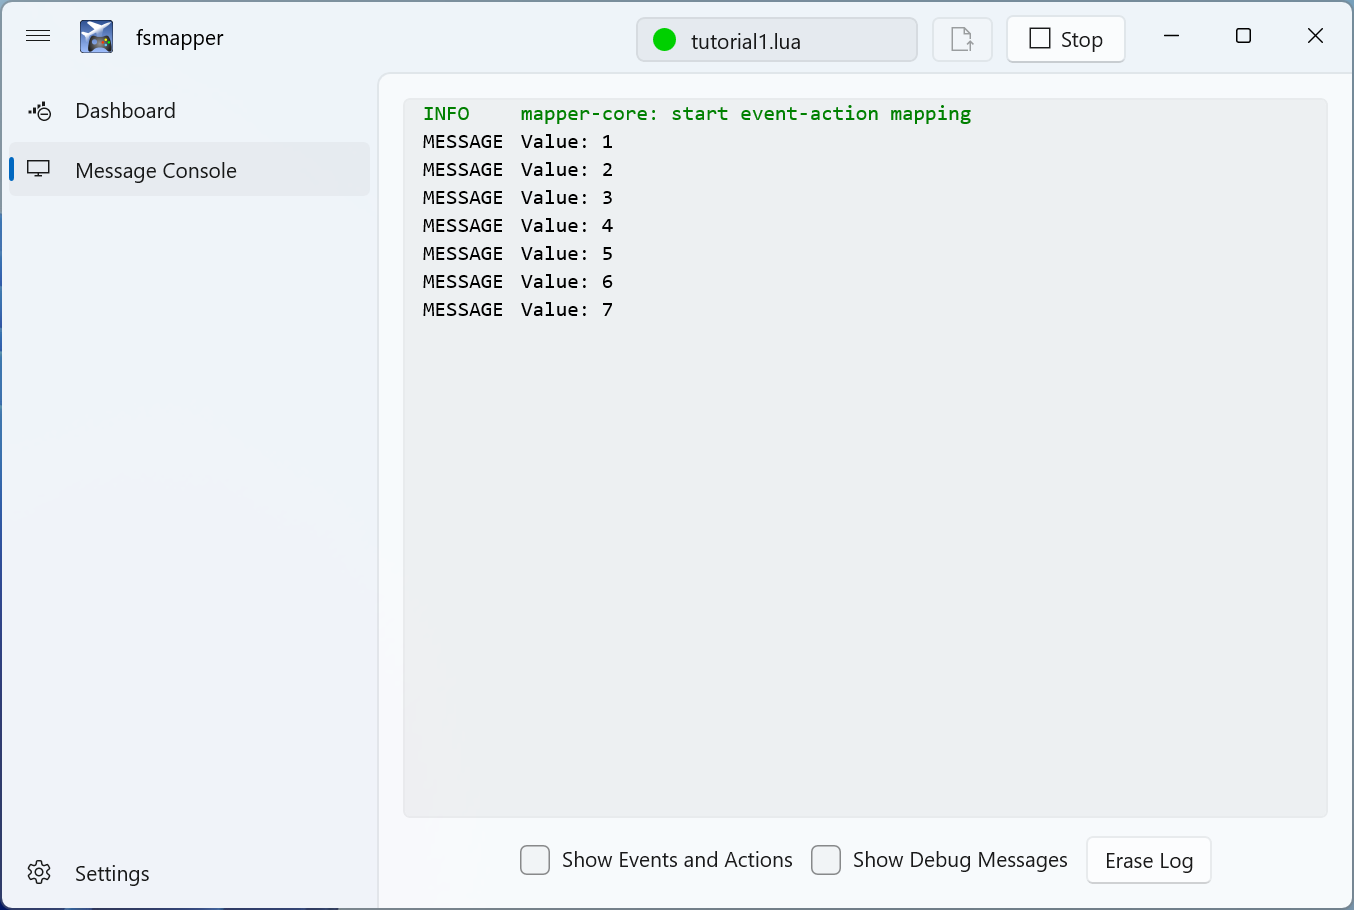
After you successfully select tutorial1.lua, select the Message Console from the left navigation pane to display the message console. You'll notice that the value associated with the 'My Event' event is incremented and displayed at two second intervals, similar to the image below.
Next, let's explore the functionality of the message console a bit further. In this script, the contents of the message were displayed in the console within the action. However, observing the events that occur can be made even simpler.
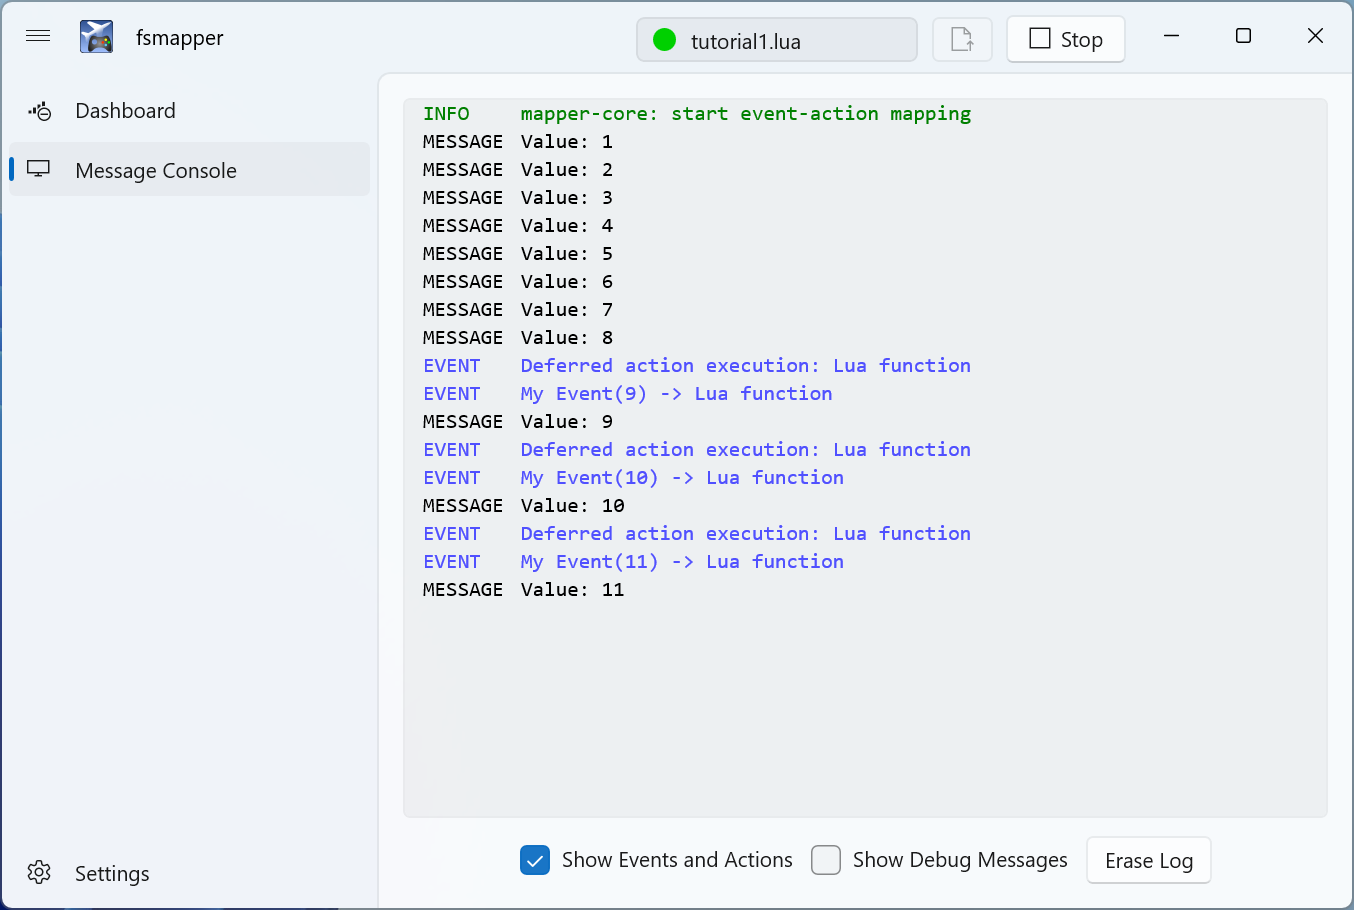
Enable the [Show Events and Actions] checkbox at the bottom of the window. This will display the events that occurred along with their associated values in blue, as shown in the image below.
Handle an input device
tutorial1.lua was essentially a script that did nothing, but this time, let's explore meaningful examples that handle input devices like flight sticks or gamepads.
device = mapper.device{
    name = 'Tutorial',
    type = 'dinput',
    identifier = {index = 1},
    modifiers = {},
}
mapper.device() is a function that opens the device and returns a Device object.
The name parameter is the user-assigned name, used for display in the dashboard or message console. Please assign an appropriate name.
The type parameter specifies the type of device to open, 'dinput' refers to gaming devices supported by DirectInput.
The Identifier parameter specifies a table representing information to identify the device, but the table format varies by a device type.
In this example, {index = 1} is specified for the identifier parameter, indicating the first device in the list of DirectInput gaming devices managed internally by Windows.
While this works, it's not recommended. Reordering due to connecting or disconnecting other devices may change the device position in the list.
This setting is chosen for a tutorial script as a default to prevent errors in any environment, but it's advisable to specify the product name or GUID for the identifier, tailored to the device you want to use.
How can one obtain the product names or GUIDs of each DirectInput gaming device? Actually, fsmapper can assist with this task. Try checking [Show Debug Messages] on the Message Console page and then restart the script. You'll see messages displayed like the following.

As you can see, the product names are displayed on the right, and the GUIDs are displayed on the left for all connected DirectInput gaming devices on the PC.
To open the X-56 throttle specifying the product name, you would set the identifier parameter like this.
identifier = {name = 'Site Pro Flight X-56 Rhino Throttle'}
For specifying the GUID, you would do it like this.
identifier = {guid = '{5EBE42D0-837D-11EB-8002-44455354000}'}
Let's execute the script with fsmapper since it has been correctly written. Check [Show Events and Actions] in the message console and then manipulate the gaming device.
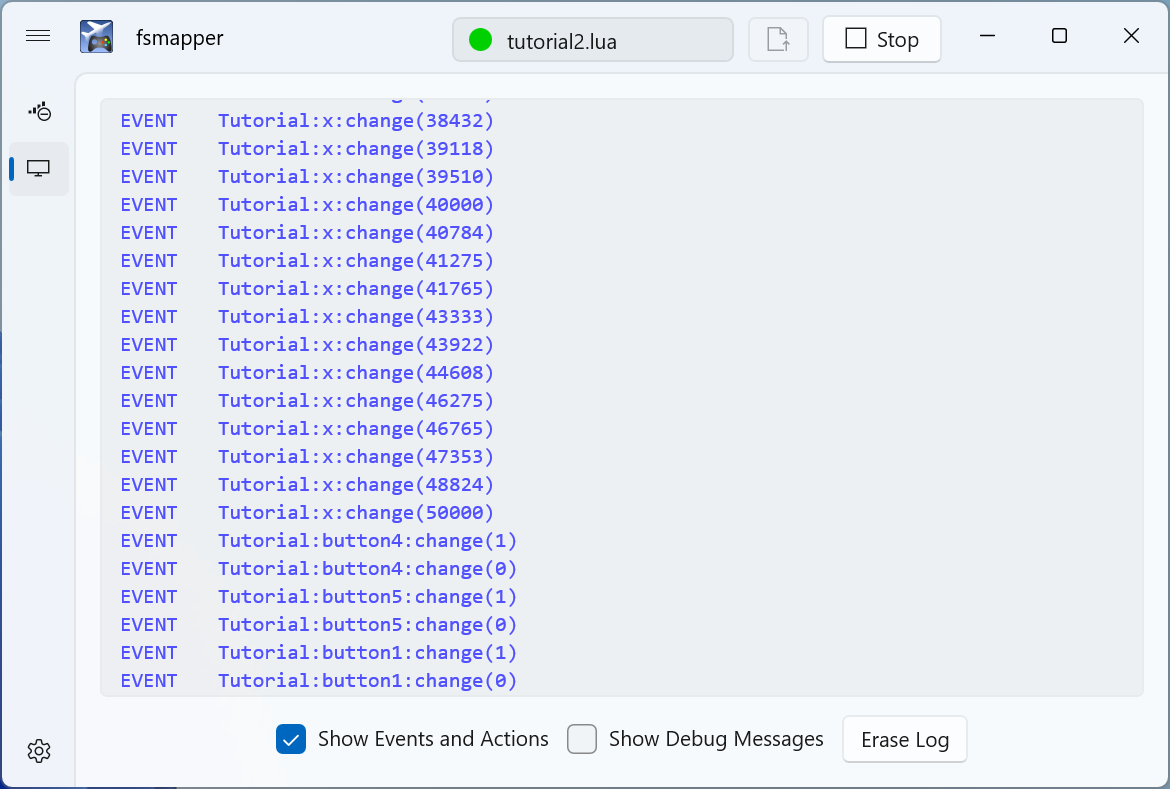
You would have observed the name of each button and analog axis and noticed the change in values as events when manipulated.
Buttons are represented by binary values of 0 or 1. Analog axes are normalized from -50,000 to 50,000 regardless of the device's resolution. Additionally, POV is represented by degrees from 0 to 360 for direction.
At the end of the tutorial on handling input devices, let's briefly touch upon one crucial concept: Event Modifier.
So far, all the events from the devices you've seen have been associated with a numerical value under the name change. With Event Modifier, you can alter the type of events that occur and their timing.
As an example, modify the modifiers parameter in tutorial2.lua as follows.
modifiers = {
    {class = 'binary', modtype = 'button'},
}
The class = 'binary' means targeting all binary-type device units such as general buttons or switches as event modifiers.
You can also specify individual device units by using the name parameter, like name = 'button1', instead of the class parameter.
The modtype = 'button' represents the type of event modifier and, in this case, performs convenient conversions for handling device units like buttons.
Execute the modified script and observe the events to see what occurs.
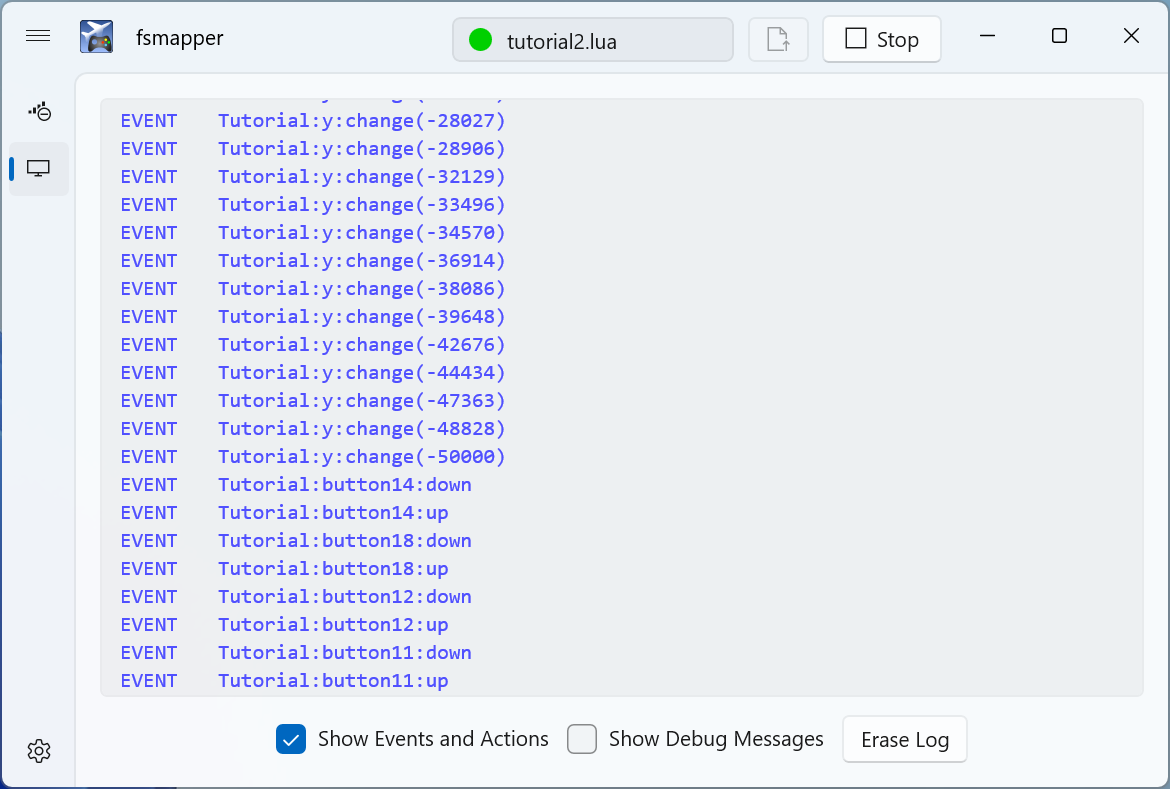
As shown in the image above, the events for analog axes are unchanged, while events for buttons are no longer labeled as change.
Instead, there are two types of events triggered: down when the button is pressed and up when it's released.
This distinction between the two events eliminates the need to explicitly handle value differences in the actions.
It allows for concise definitions within the Event-Action mapping, reducing CPU load.
Additionally, the button event modifier option enables the generation of events for actions like double clicks or long presses.
Interact with Microsoft Flight Simurator
This section marks the end of the tutorial. Let's finally control an aircraft in Microsoft Flight Simulator. The goal is to register the following two Event-Action mappings.
- Toggle the landing light switch according to the press of button1 on the gaming device.
- Toggle the strobe light switch according to the press of button2 on the gaming device.
Append the highlighted portion of the following script from line 9 onwards to the script created in the previous section.
device = mapper.device{
    name = 'Tutorial',
    type = 'dinput',
    identifier = {index = 1}, -- Shoud be modified this line to suit your environment
    modifiers = {
        {class = 'binary', modtype = 'button'},
    }
}
local events = device:get_events()

mapper.set_primary_mappings{
    {
        event = events.button1.down,
        action = function ()
            msfs.mfwasm.execute_rpn('0 (A:LIGHT LANDING:0, Bool) ! (>K:2:LANDING_LIGHTS_SET)')
        end
    },
    {
        event = events.button2.down,
        action = msfs.mfwasm.rpn_executer('0 (A:LIGHT STROBE:0, Bool) ! (>K:2:STROBES_SET)')
    },
}
This script may function with many of Asobo's default small aircraft, but it might not work with aircraft that have three-state light switches or third-party add-on aircraft.
The added initial line retrieves a table containing event IDs according to each device unit's events using the get_events() method of the Device object.
In the two Event-Action mappings, cockpit devices are manipulated by executing RPN script. In MSFS, RPN script serve as one of the most versatile means of interaction.
You might notice a slight difference in the descriptions of the two actions. The action for button1 registers a Lua function as an action, similar to tutorial1.lua. Within that function, it calls msfs.execute_rpn() to execute the RPN script.
The action for button2 doesn't register a Lua function but instead registers an object returned by msfs.rpn_executer(). This function returns a specific type of fsmapper object called a Native-action. Native-action objects are implemented in precompiled native code by fsmapper, can be registered as actions, and can be executed with lower overhead compared to Lua functions.
Apart from RPN execution, fsmapper offers several Native-actions.
How can one find the RPN that corresponds to the operation of each object in the cockpit? Some considerate developers document like this information, making it a good reference point.
Unfortunately, many addon aircraft lack such documentation, including default aircraft. However, Microsoft provides useful tools for developers, making it relatively easy to gather hints for writing RPN scripts.
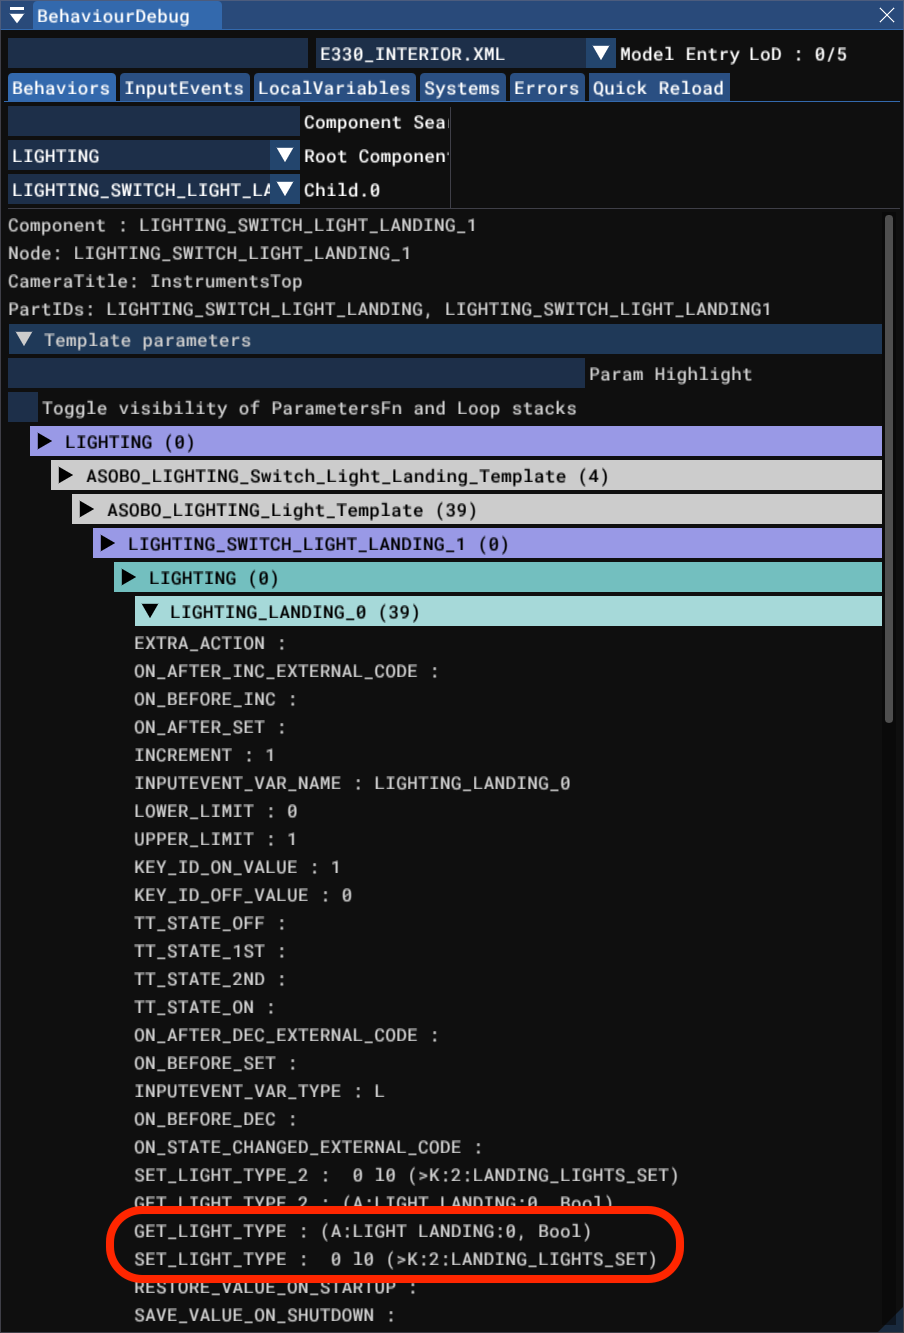
Enabling Developer Mode and displaying the Behavior Debug window allows you to explore the <Behaviors> definitions of an aircraft's interior model XML file more easily.
This image illustrates referencing the Landing Light definition from the Model Behavior within the Extra 330's interior model, demonstrating how to find the information underlying the above RPN.
